Showing posts with label Scrapbook. Show all posts

16.6.10

$4 Wall Art

I found these 8x8 easels at the Dollar Tree. They were meant for coloring in the Disney Princess but instead, I spray painted them with off white spray paint (I already had on hand). Here's a picture of how they looked when I bought them and after I spray painted them...
After the spray paint dryed, I cut scrapbook paper (already had on hand) with my cricut and Mod Podged it to the easels (already had on hand) .

I love how it came out. Perfect decor for my girls room and $4... Can't beat that :)


7.6.10

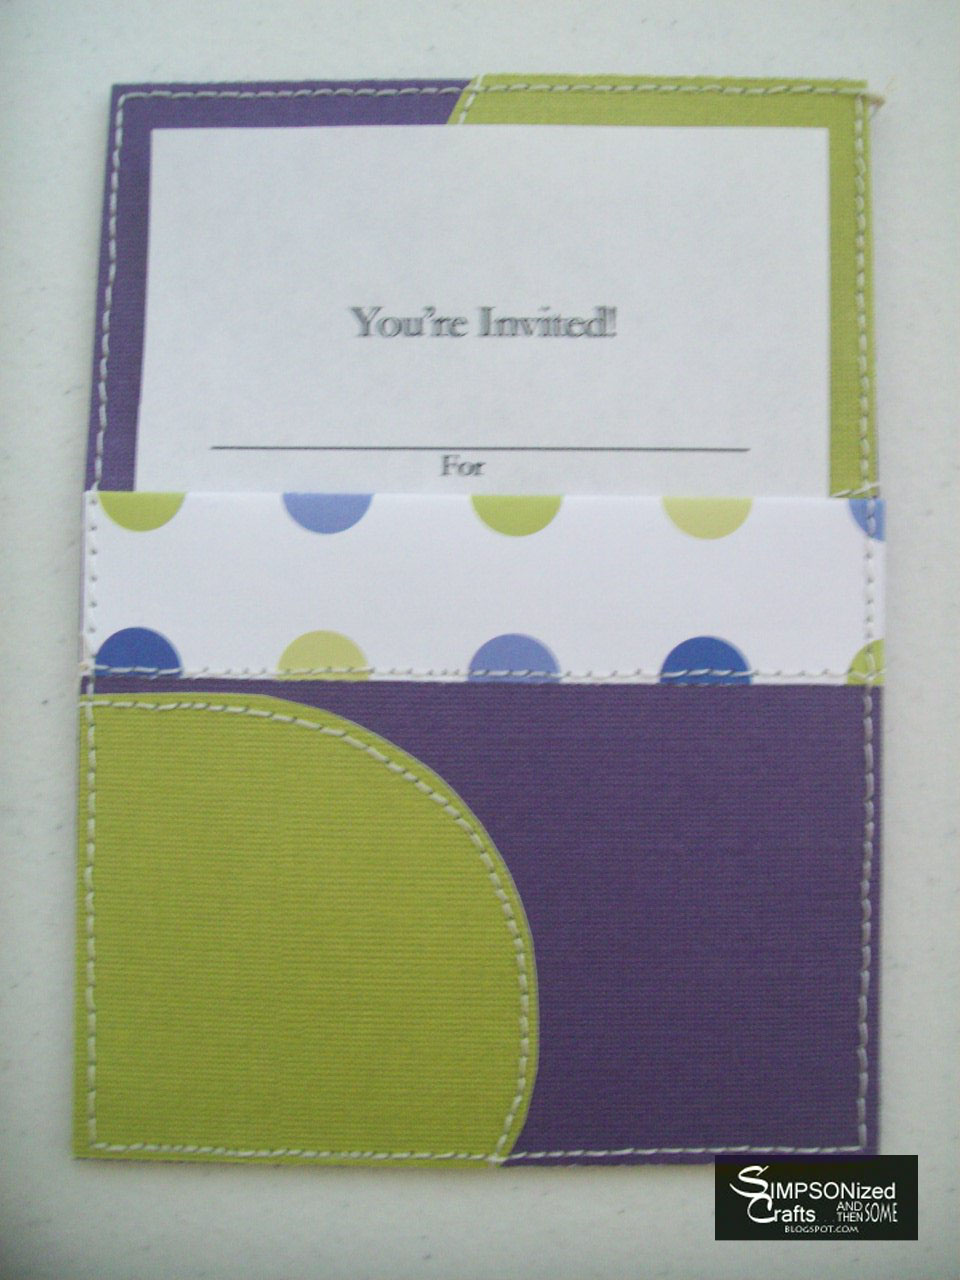
Invitation Card and Pocket

These are so cute. I've done them for a couple of baby showers now and love how they came out every time. I'll be putting these up in my esty shop soon but for now, here's how I make them.

For one Invite pocket, you'll need:

Solid scrapbook paper cut 4.25 x 12
Pattern scrapbook paper cut 2 x 4.25
Accent color scrapbook paper cut in a corner circle: corners 2.25 x 2.25 (look at picture)
Creased as follow:


Here's pictures of the instructions (if you have any questions or interested in a custom order, just shoot me an email simpsonizedcrafts@yahoo.com)


I'm linking this up to:
Blog Button


4.6.10

House Hold Rules

This idea has been all around this blogging world and I finally finished mine!
I did it a little different. Here's how mine came out:


I was lucky with this project because I used things I alreay had on hand! Wait, I lyed, I did buy Command strips to hang it SO, I spent $3.00.

First, I came up with my sayings (or rules). I did it in a tile form; have the "starting" word in the middle and the rules on the side... (this is hard to explain). Here's a close up to show you what I mean...


SO, you would read it as follows: Always Participate, Always Strengthen, Always Help, Always Encourage...etc.

Then you need a board. Let me show you want I used for the board.


Yup, I used this normally "trashed" item that my Grandma saved for me. (She usually buys gift card holders in this 12 pack container from Costco). When she showed me, I new it would work perfect as a board.
Here's what I did:

I wrapped it in brown wrapping paper (again, already on hand)

Mod Podge the rule tile paper to the board

Put a thin layer of Mod Podge on top
Let dry.

Paint the edges black (making a frame around the paper)
let dry.

Since the board was NOT wood. I couldn't hammer a saw tooth hanging bracket on the back.... That's where the Command Picture Hanging Strips came into play.
You can print off a couple for these Command strips here

I placed two Command strips on the top corners and one on the bottom middle


Then I stuck it to the wall.

I also cut vinyl with my cricut:
Simpson's Household Rules....
Living in this World,
Experiencing all God's thrill

(oops, I just realize I didn't add the "h" in thrill. I'm going to have to fix that) lol
I'm linking this up to:
Blog Button

3.6.10

Hair Bow Holder

I was inspired by Keeping it Simple's Ribbon Clip Holder. I knew I had to make one for my girls bathroom! Here's how mine came out.


These were so SIMPLE and fast to make, the hardest part was picking out my paper and the longest part was waiting for the paint to dry!

Here's how I did these:

First, you start with a plain wooden plack

Messure and cut out the paper to fit inside the plack's frame

Paint the rim of the plack, let dry.

Mod Podge the paper to the plack with the frame showing

(making sure to put a thin coat of Mod Podge over the whole front side of plack)

Add ribbon of your choice and pin them with upholstery nails (using a hammer)
I DID NOT pull my ribbon taunt for the purpose of easy access to the bows as well as easy to put them back on.

giveaways

LinkWithin

Related Posts with Thumbnails